

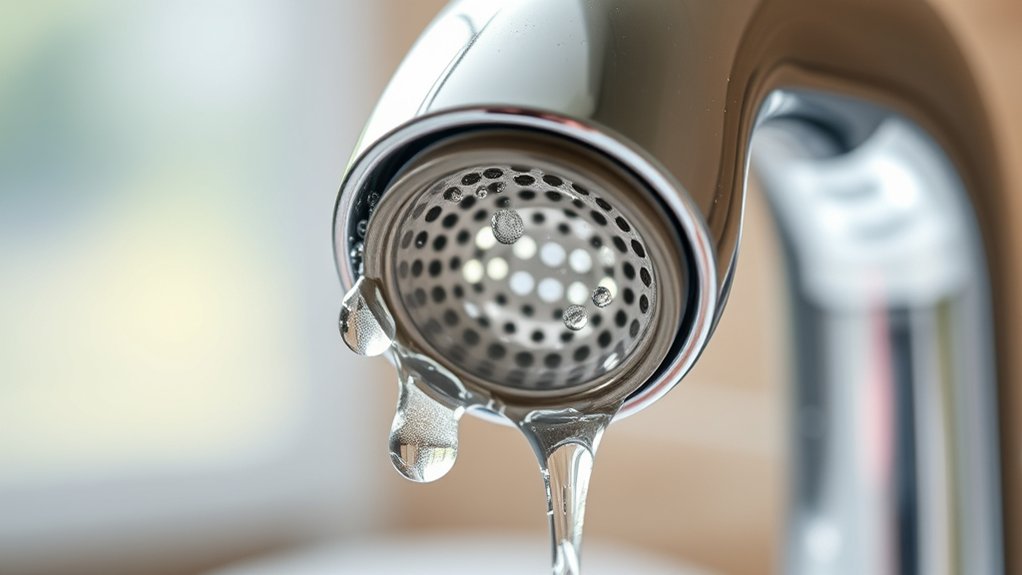
Yes, an aerator can cause a faucet to drip if it becomes clogged. A clogged aerator increases internal water pressure and disrupts the flow of water.
When mineral deposits or debris build up, they restrict water flow, forcing pressure to rise inside the faucet. This added strain can wear out seals and lead to leaks, even when the faucet is turned off.
To fix this issue, you should inspect and clean the aerator carefully.
Understanding how to manage aerator problems can help you prevent drips effectively.
Key Takeaways
- A clogged aerator increases internal water pressure, which can cause faucet seals to weaken and lead to dripping.
- Mineral buildup in the aerator disrupts water flow, contributing to uneven streams and potential leaks.
- Aerator debris or damage can cause water to drip even when the faucet is off.
- Regular aerator cleaning removes deposits, restores proper flow, and usually stops drip issues.
- If drips persist after cleaning, other faucet parts like washers or cartridges may need inspection or replacement.
How a Faucet Aerator Works
A faucet aerator works by mixing air into the water stream to reduce flow while maintaining pressure. This aerator function maximizes water flow by breaking the stream into smaller droplets, which introduces air and decreases volume without sacrificing force.
When you install an aerator, it creates a steady, pressurized flow that feels strong but uses less water. The aerator’s mesh screen and flow restrictor work together to control the water flow rate, enhancing efficiency and reducing splashing.
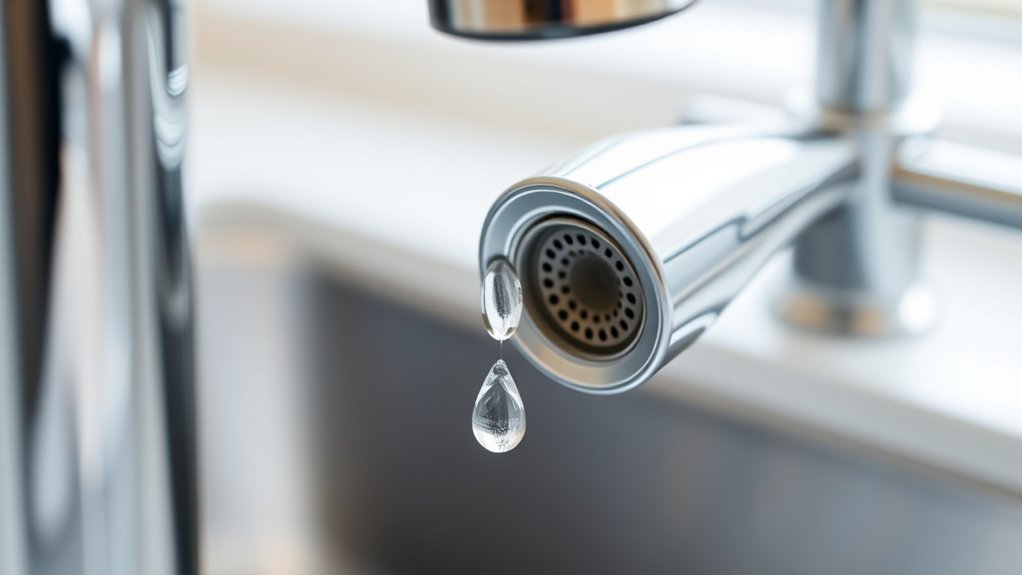
Can a Clogged Aerator Cause Faucet Drips?
A clogged aerator can disrupt water flow and increase pressure, which might cause your faucet to drip. You’ll often notice inconsistent water streams or slow drainage when blockage occurs.
Cleaning the aerator restores proper flow and usually stops the drip issue quickly.
Aerator Blockage Effects
Although a clogged aerator primarily reduces water flow, it can indirectly contribute to faucet drips by increasing internal pressure and causing seals to weaken over time. Regular aerator maintenance prevents flow restriction, ensuring consistent water delivery and protecting faucet components.
| Effect | Description |
|---|---|
| Flow Restriction | Reduced water volume due to blockage |
| Pressure Buildup | Increased internal pressure |
| Seal Stress | Accelerated wear on faucet seals |
| Drip Formation | Resulting leaks from compromised seals |
You should clean or replace aerators periodically to avoid blockages. This simple step minimizes internal strain and reduces drip risks, maintaining your faucet’s integrity and performance.
Water Pressure and Drips
When water flow faces obstruction from a clogged aerator, your faucet’s internal pressure can rise, increasing the likelihood of drips. Elevated water pressure strains faucet seals and valves, making them prone to leaks. Understanding this connection helps you identify one of the subtle drip causes.
You might notice:
- Persistent dripping despite turning off the faucet fully
- Sudden increase in water bills without visible leaks
- Uneven water flow or sputtering when using the faucet
These signs indicate pressure buildup linked to aerator blockage. Addressing water pressure issues promptly prevents damage to your faucet components and reduces drip-related water waste. By monitoring and maintaining proper flow, you minimize unnecessary repairs and conserve water efficiently.
Cleaning Aerator Benefits
Three key benefits come from regularly cleaning your faucet aerator, especially in preventing drips caused by clogs. First, cleaning removes mineral deposits and debris that restrict water flow, which can cause pressure buildup and lead to faucet dripping.
Second, proper aerator maintenance improves water efficiency by ensuring a consistent, controlled stream, reducing unnecessary leakage. Third, regular cleaning extends the lifespan of your faucet by preventing corrosion and wear caused by sediment accumulation.
To maintain peak function, follow aerator maintenance tips: unscrew the aerator, soak it in vinegar to dissolve deposits, and use a brush to clear residual debris. Incorporating these steps into your routine maximizes the benefits of cleaning, ensuring your faucet operates drip-free and maintains water efficiency over time.
How to Tell if Your Drip Is Coming From the Aerator
How can you quickly determine if the drip is coming from your faucet’s aerator? Start with a focused aerator inspection to isolate the drip source. Watch the faucet closely when off; if water drips directly from the aerator screen, you’ve identified the issue. Use drip detection techniques like placing a dry tissue under the aerator—wet spots confirm the leak origin.
Feel frustrated by persistent drips disrupting your peace.
Worry about water waste increasing your bills.
Desire a quick fix without costly repairs.
Removing and Inspecting Your Faucet Aerator
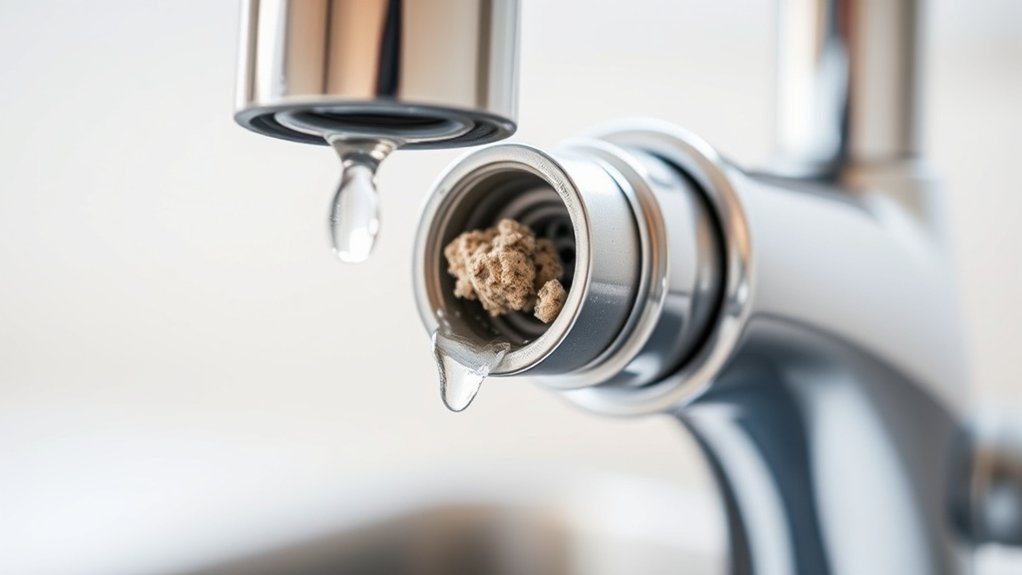
Start by unscrewing the faucet aerator carefully using your hand or a wrench wrapped in tape to prevent damage. Once removed, place it on a clean surface for aerator inspection.
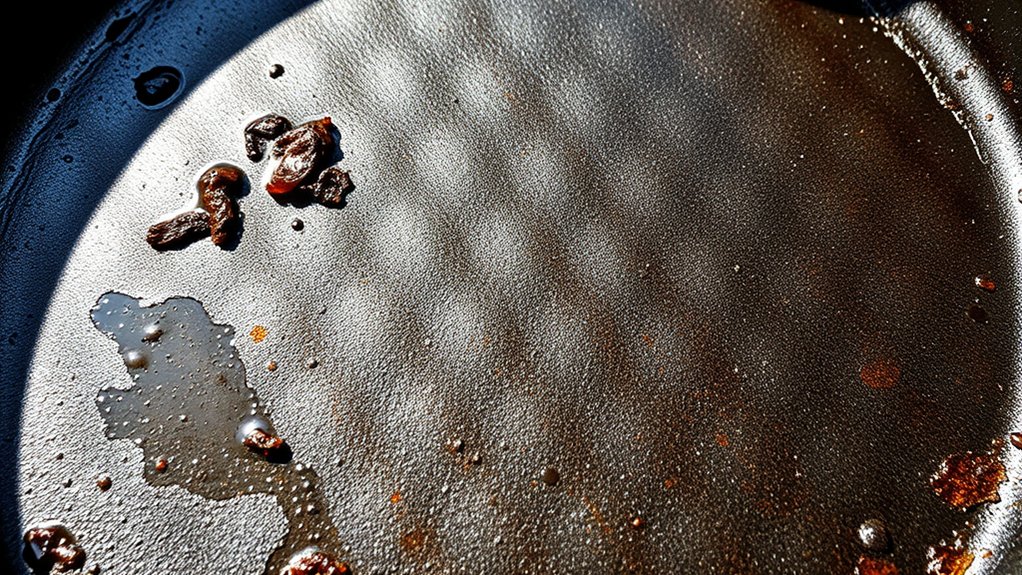
Check for mineral buildup, debris, or damage to the screen and housing, as these issues can contribute to faucet dripping. Examine the rubber washer or gasket for signs of wear or deformation, which can compromise the seal.
Inspect for mineral deposits, debris, or damage to prevent leaks and ensure a tight seal with the washer or gasket.
Proper faucet maintenance requires routine aerator inspection to identify these problems early. If you spot any cracks or excessive buildup, replace the aerator or its components as necessary. Conducting this inspection guarantees your faucet functions efficiently and prevents drip-related water waste.
Keep the parts organized for reassembly after cleaning or replacement.
How to Clean Your Aerator and Stop the Drip
Once you’ve removed and inspected the aerator, you’ll need to clean it thoroughly to restore proper water flow and stop the drip. Effective aerator maintenance relies on precise cleaning techniques to remove mineral deposits and debris.
Start by soaking the aerator parts in a vinegar solution for 30 minutes to dissolve buildup. Then, use a small brush or toothpick to clear clogged holes carefully. Finally, rinse all components with water before reassembling.
Regain control over your faucet’s performance
Prevent frustrating, continuous dripping
Extend the life of your faucet with minimal effort
Follow these steps consistently to maintain ideal water pressure and eliminate leaks caused by clogged aerators. Proper cleaning techniques are essential for efficient aerator maintenance and drip prevention.
When to Replace Your Faucet Aerator Instead of Cleaning
When should you replace your faucet aerator instead of cleaning it? Typically, an aerator lifespan ranges from 1 to 3 years, depending on water quality and usage.
If you notice persistent dripping, reduced water pressure, or visible corrosion despite thorough cleaning, these are key replacement signs. Cracks or mineral buildup that won’t come off with vinegar or a brush indicate damage beyond repair.
Also, if the aerator’s mesh screen is torn or clogged irreversibly, replacement is necessary. Continuing to use a compromised aerator can worsen leaks and damage your faucet.
To maintain peak function and prevent drips, replace the aerator promptly once these signs appear, ensuring efficient water flow and extending your faucet’s longevity.
Other Faucet Parts Besides the Aerator That Can Cause Drips
Although the aerator is a common source of faucet drips, other components like washers, O-rings, and cartridges can also cause leaks. If you notice persistent dripping after cleaning or replacing the aerator, inspect these parts closely.
A worn-out washer often requires replacement to seal the valve properly. Similarly, damaged O-rings can let water escape, causing steady drips. The faucet cartridge, which controls water flow and temperature, may also wear down or crack, necessitating replacement.
Addressing these components promptly prevents water waste and costly damage.
- Frustration from recurring drips despite aerator care
- Concern over rising water bills and wasted resources
- Urgency to perform washer replacement or faucet cartridge repair for a lasting fix
Frequently Asked Questions
Can a Faucet Aerator Affect Water Pressure?
Yes, your faucet aerator directly affects water flow by regulating pressure. If it clogs, it reduces flow and pressure.
Cleaning or replacing the aerator restores ideal pressure regulation and improves overall water performance.
How Often Should I Clean My Faucet Aerator?
Think of your faucet aerator as a tiny garden. Clean it every three to six months for ideal faucet maintenance. Regular aerator cleaning prevents buildup, ensuring steady water flow and avoiding pressure drops or drips.
Are There Different Types of Faucet Aerators?
Yes, you’ll find various types of faucet aerators, including standard, laminar flow, and spray. Each type offers benefits like water conservation, improved pressure, and reduced splashing, helping you optimize your faucet’s performance efficiently.
Can a Damaged Aerator Cause Water Discoloration?
Yes, a damaged aerator can cause water discoloration. You should perform regular aerator maintenance to clean or replace damaged components, preventing buildup of minerals or debris that affect water quality and color.
Is It Possible to Install a Water Filter With an Aerator?
Though an aerator and water filter might seem conflicting, you can install both by ensuring water filter compatibility and following precise aerator installation techniques. This setup optimizes filtration without compromising water flow or faucet integrity.
Conclusion
If your faucet drips, don’t overlook the aerator—clogs in this small device cause about 15% of faucet leaks. By removing and inspecting it, you can quickly identify issues. Cleaning often solves the problem, restoring proper flow and stopping drips.
However, if buildup is severe or damage exists, replacing the aerator is your best bet. Remember, other parts may cause leaks, so a thorough check guarantees an efficient, drip-free faucet.
In conclusion, an aerator can cause a faucet to drip, so addressing it early can save you time and prevent further issues.

Leave a Reply